| we ship to: |                                      |
| we ship to: | |

If you share your MacBook with others or simply want to protect personal data from prying eyes, you may need to hide certain folders and files. This is particularly relevant if you often work in public places, lend your laptop to colleagues or friends, or wish to prevent the accidental deletion of important documents.
In this article, we’ll explore how to hide files on Mac computers using various methods. You’ll learn how to make them invisible to other users, hide them from the desktop during screen sharing, and determine the best locations for storing confidential information securely. We’ll explore both built-in macOS features and third-party applications that can help you efficiently accomplish this task.
There are several reasons why you might want to hide files and folders on your MacBook:
Regardless of your reasons, there are several simple and effective ways to hide files and folders on a Mac. Let’s explore them in more detail.
Also: MacBook Won't Download Files: Causes and Tips for Quick Fix
There are various proven methods to hide files on Mac. Some are suitable for quickly hiding folders from the desktop, while others offer more robust data protection from other users. Choose the method that best suits your needs and level of computer literacy.
The quickest and easiest way to hide files and folders on a Mac is to use a keyboard shortcut. This is a built-in macOS feature that allows you to instantly make selected items invisible. What is the shortcut to hide a file on Mac? Let’s take a look at how it works:
To undo the hiding and make the files visible again, simply repeat the same actions: select the location where the hidden items were, and press Shift + Command + period (.). They will reappear in their original positions.
This method is ideal for quickly removing several files or folders from the desktop, for example, before screen sharing or taking a screenshot. However, keep in mind that any user who knows this keyboard shortcut can easily undo the hiding and access your files. Therefore, for more reliable protection of confidential data, it’s better to use other methods.
If you need to hide folders and files more securely on your Mac, you can use the Terminal command line. This is a built-in macOS utility that allows you to perform various operations with the file system and computer settings. To hide a folder using Terminal, follow these steps:
To undo the hiding and make the folder visible again, enter the command chflags nohidden instead of chflags hidden in step 2.
It’s important to remember that when using Terminal, you need to enter commands accurately and carefully to avoid accidental deletion or damage to system files. Besides, always keep the full path to the hidden folder so you can easily find and undo the hiding later on.
There may be occasions when you need to quickly conceal all icons and folders on your desktop, for instance, before screen sharing during a presentation or meeting. Of course, you could manually drag each item to another folder, but this would consume much time and effort, especially if your desktop contains numerous files.
Fortunately, there’s a quicker and more convenient way — use applications specifically designed for this purpose. They add a button or toggle switch to the macOS menu bar. By clicking on it, you instantly hide all folders and files on your desktop. Let’s explore how to hide folders on the Mac’s desktop with these two popular solutions:
Both of these applications are excellent choices for those seeking to learn how to hide downloads on a Mac desktop, aiming to maintain order and cleanliness without spending extra time manually moving files and folders.
If you have particularly important or confidential files that need to be securely hidden from prying eyes, you can utilize the hidden Library folder built into macOS. It’s intended for storing system files and settings, but you can create your own folder inside it and store anything you need to keep secret.
Here’s how to access the Library folder and hide your files there:
This method provides an additional level of security for your files because most users are unaware of the existence of the Library folder and won’t look for your documents there. Additionally, this folder is hidden by default in macOS, making stumbling upon it practically impossible.
However, remember that if someone gains access to your Mac user account, they can view the contents of the Library folder and find your hidden files. Therefore, for maximum protection of confidential data, it’s best to use this method in combination with others, such as encryption or passwords.
In macOS, files whose names start with a dot are automatically hidden in Finder and other file managers. Here’s how to make invisible files on Mac:
To undo the hiding, simply remove the dot from the beginning of the file or folder name. This method is simple and convenient, but it has some drawbacks:
Therefore, before using this method to hide important data, ensure that it won’t be accidentally lost or damaged.
Also: MacBook Finder Search Not Working: 9 Tips for a Quick Fix
Can you make a folder private on Mac? Absolutely! FileVault is a built-in security feature on macOS that allows you to encrypt your entire disk, including files and folders you want to hide. Here’s how to use FileVault:
Once the encryption process is complete, all files and folders on your disk will be invisible to anyone who doesn’t know the password.
If you want to completely hide files and folders from other users of your Mac, you can use Apple’s developer tools. They allow you to modify file attributes and make them invisible to everyone except you. Here’s how to do it:
To undo the hiding and make the files visible again, use the command setfile -a v (with a space after “v”) instead of setfile -a V in step 2.
This method of hiding files is more reliable than simply adding a dot before the file name because it makes them invisible at the system level. However, it requires the installation of additional software (Xcode) and may be slightly more complex for beginners.
If you share your Mac with other users and want to hide your files from them securely, you can create a separate user account and store confidential data there. This may be more convenient than using the Terminal or manually changing file attributes. Here’s how to do it:
Now, these files will only be accessible when logged into this user account and will be securely hidden from other users. Of course, you’ll need to switch between accounts each time you need to access the hidden files, but it’s a reasonable trade-off for increased privacy.
Keep in mind that other administrators can still access your files, so this method doesn’t provide absolute protection. However, it’s certainly better than storing confidential data in a shared folder or on the desktop.
Hiding files and folders on a Mac is a useful skill that will help you protect confidential data, free up space on your desktop, and keep your files safe. However, it’s also important to keep your device in excellent condition to avoid losing information at critical moments.
Also: How to use System Settings (Preferences) on a MacBook
If you require original parts for repairing or upgrading your Apple device, be sure to visit our platform, Techtoro.io (TechToro.io). Our site offers a selection of components for various models, as well as the opportunity to purchase used devices or sell your MacBook at a favorable price.
Thanks to our professional team of specialists and the convenient process of buying and selling, Techtoro.io will become your indispensable assistant in servicing and updating your favorite device. So don’t forget to bookmark the website to always have a reliable source of quality parts and services at hand.

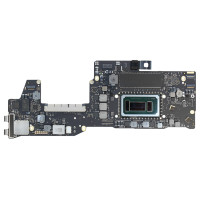
GENUINE LOGIC BOARD 1.1GHZ I3 16GB 256GB (661-14746) A2179 2020

|
ABOUT THE AUTHOR
Volodymyr Chubei Volodymyr was born in Ukraine and has found his passion for electronics from his childhood. At the age of 13, he was capable of soldering some basic elements of a logic board and today he is one of the co-founders of TechToro.io |


The new MacBook Air M4 has already hit the market, so let’s take a look at ...
Read More

You can download files and updates to your smartphone using a computer. The...
Read More

Soon, from June 9 till June 13, all Apple fans will be able to witness the ...
Read More

Over time, some of your MacBook features may not be enough for comfortable ...
Read More