To create video tutorials, guides, and other similar things, use the screen recording option. MacBook has special applications for this purpose as well as third-party programs. In this article, we will talk about how to screen record on MacBook in different ways.
Mac screen recording with built-in tools
Apple has provided several useful tools that you can use to record your screen. We suggest you thoroughly consider how to work in each application, as well as use Siri for this purpose.
1. QuickTime Player
This is the standard Mac screen recording app that comes with macOS.
How to use:
- Find the QuickTime Player application via Spotlight (Cmd+Space) or in the Programs folder.
- Launch the application, go to the File menu and select New Screen Recording.
- Customize the parameters to suit your capabilities and requirements.
- Click on the red button to start, pre-selecting the whole screen or a specific part of it.
- Click on the stop icon in the menu bar to complete the process.
- Save the recording by clicking on Save.
2. Screenshot
This is a screen recording and screenshot application with flexible process settings.
How to screen record on MacBook with Screenshot:
- Press Cmd+Shift+5 to open the toolbar.
- Select Record Entire Screen or Record Selected Portion.
- Press Record to start recording.
- Click on the stop process icon in the program menu or use Cmd+Shift+5 again.
- The recording will be saved to the desktop. In the settings, you can set up saving to a specific folder.
3. Siri
The voice assistant is used to quickly start and stop recording without distracting you from your current tasks.
How to record on Mac using built-in assistant:
- Go to the Apple menu (apple icon in the upper left corner of the screen) and select System Preferences.
- Tap Siri and make sure it is enabled. If not, check the box next to Enable Ask Siri.
- Verify that Siri has permission to access the screen. If you are prompted to give permission, accept it.
- Click the Siri icon in the menu bar (top right corner of the screen) or use the keyboard shortcut to activate (it is Cmd+Space by default).
- If voice activation is configured, say "Hey Siri" and then "Start screen recording".
- The Screenshot Toolbar will open and screen recording will start.
- To stop the process, click the Siri icon again or use Cmd+Space. When voice activated, say "Hey Siri" and "Stop screen recording".
- The screen recording stops and the file is automatically saved to the desktop or a specified folder.
Mac screen record apps
To record the screen, you can install external applications that have a more simplified and intuitive interface than the built-in tools. Among such software, you can choose between simple options and applications with a variety of functions.
Apps for free screen recording on Mac
Below you can find instructions for applications that are available for free. They are simple and easy to understand even for users who will record actions on the computer screen for the first time.
OBS Studio
This app offers powerful options for recording and streaming. You can experiment with settings and plugins to achieve the best results.
How to use the app:
- Go to the official OBS Studio website, download and install the program.
- Open OBS Studio from the Programs folder. You may need to allow the application to run from an unknown source in the security settings (System Preferences and then Security & Privacy).
- If you run the app for the first time, go to Settings in the lower right corner of the window.
- Select the Output tab and make sure Simple mode is selected.
- In the Recording section, select a file saving path, select a recording format (e.g., MP4), and customize other settings at your discretion.
- On the Video tab, select the resolution and frame rate.
- Click Start Recording in the lower right corner.
- To end the recording, click on Stop Recording there.
Monosnap
This free app for screen recording on Mac is distinguished by its ease of use and handy features.
Detailed instructions on how to install and use the software:
- Go to the official Monosnap website, click on Download, select the version for your macOS, download the installation file and open it.
- Drag the application icon to the Applications folder.
- Open Monosnap, and if necessary, allow the application to run from an unknown source (System Preferences, Security & Privacy).
- The first time you run the software, the icon will appear in the upper right corner of the screen.
- Click on the icon and select Preferences.
- In the Recording section, adjust the quality, frame rate, and select an audio source.
- To start recording, click on the application icon, select Record Video and capture area (the whole screen or a part of it), click Start Recording.
- To stop the process, click Stop Recording in the application window. The recording will be saved to the specified folder.
Apowersoft Free Online Screen Recorder
It's a handy web-based tool that doesn't require a full installation on your computer.
The instructions for use are as follows:
- Go to the official website of Apowersoft Free Online Screen Recorder.
- Click Start Recording.
- If you are using the tool for the first time, you will be prompted to download and install a small startup file. Do so by following the on-screen instructions.
- Select the recording area, audio source, quality, and, if necessary, customize other available settings.
- Press the REC button to start screen recording. During the process, you can pause and resume recording using the corresponding buttons on the control panel.
- Click Stop to finish. The video will then open in a preview window.
- Click on Save to save the video to your computer by selecting the suggested format and folder.
Best Paid Screen Recording Applications for Mac
There are many applications that offer advanced features and high-quality recording. Below we will review three popular and convenient programs that can be used on a paid basis.
Camtasia
It is a tool for creating high-quality content. You can use it to record the screen and add various effects to make your video look as professional as possible.
After downloading and installing Camtasia from the official website, do the following:
- Open Camtasia from the Applications folder and select New Project.
- In the toolbar, click the Record button, customize the settings according to your needs, and select the desired area.
- Click on Start Recording (after a three-second countdown, recording will begin).
- Press Stop or the combination Cmd+Shift+2 to stop the process.
- In the editor window, you will be able to trim the video, add text, and various effects.
- After editing, click Export, select the export format and settings, click Next and Finish to save the video to your computer.
ScreenFlow
This is a powerful video recording and editing application. To get started, go to the official ScreenFlow website, click on Free Trial or Buy to download the installation file. Then follow the below algorithm:
- Open the installation file and drag the ScreenFlow icon to the Applications folder and launch the software.
- Select New Document, select the resolution and frame rate and click OK.
- Click on File and then on New Recording.
- Select a specific area/window, audio source and customize other settings if required.
- Press the red button to start the recording process and Stop Record (or Cmd+Shift+2) to stop it.
- After the recording is stopped, you can edit the video.
- Finally, click on File, select Export to save the video to your MacBook.
Snagit
This is a screen capture and recording application developed by TechSmith. After downloading and installing the application from the official website, follow the instructions:
- If you use Snagit for the first time, you can customize the basic settings (follow the on-screen instructions).
- In the application window, select Video mode.
- Click on the camera icon, select the desired area, and select the audio source.
- Press REC to start recording and Stop to stop the process.
- Edit the video if necessary.
- Finally, click File and then click Save As to save the video to your computer. Select the format and folder to save.
Techtoro has a large selection of parts for various MacBook models. The store offers guaranteed original Apple components, not fakes or cheap analogs. You will be pleasantly surprised by the prices and speed of delivery.
If you are not sure that you can replace the part without going to the workshop, order MacBook repair at Techtoro by mail. Our experts will quickly and effectively repair your laptop, and after paying the bill for the services, you can get it back within 1-2 working days.

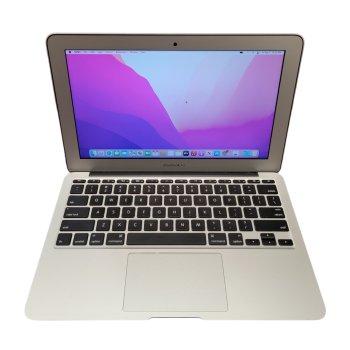
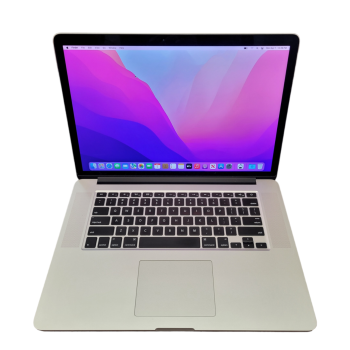
Genuine Apple Macbook Pro 15 2017 (INTEL CORE I7 2.8GHZ, 16GB, 512GB, RADEON PRO 555) Space Gray