| we ship to: |                                      |
| we ship to: | |

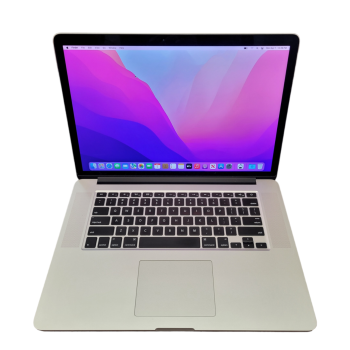
The display is one of the most unprotected elements of a MacBook Pro Retina 15 A1398 2015, so damage frequently occurs and display replacement is required. In this article, we will explain in detail how to replace the display by yourself, using step-by-step instructions.
To process the replacement you will need a table or other flat surface and a small set of tools. You need tweezers, TR8, T5 and P5 precision screwdrivers, needle-nosed pliers and a spudger: a special spatula for opening and working with the internal components of portable equipment.
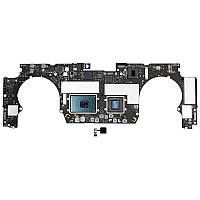
Also: MacBook Pro A1398 2015 Logic Board replacement
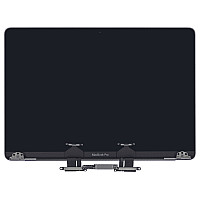
.png "MacBook Pro Retina 15 A1398 2015 Display Replacement - TechToro 1")
Genuine LCD Screen (Display) Assembly (661-02532) A1398 2015
To replace the old display with a new one, we offer the detailed step-by-step instructions for the MacBook Pro Retina 15 A1398 2015 model. It is important to follow the strict sequence of the process in order to prevent damage to parts and ensure display performance after replacement.
Undo six 3.1mm screws and two 2.3mm screws, note their location so that you don't confuse the holes when assembling. Lift the bottom part of the case at the display connection area and remove it by carefully releasing the pins from the plastic clips.

Find the black sticker that covers the battery connector and remove it. To remove the connector, gently pry off the ends on both sides with a spudger. Bend the connector towards the battery so that it cannot contact the motherboard during the replacement process.


Find the three AirPort antenna cables near the fan, use tweezers or a spudger to remove them from their sockets and bend them up. Work only with connectors during the process, because the cables are very fragile and can be easily damaged if handled carelessly.


Remove the fan cover and bend it as far as possible. Use the tip of a spudger to carefully pry the camera cable connector out of the socket on the motherboard. To do this, loosen the connector on the right and on the left with smooth movements until it is completely taken out.

Carefully release the camera and antenna cables from their sockets. The reverse side of them is mounted on the fan, you need to work without sudden movements so as not to break the integrity of the cables and connections.

Use the tip of a spudger to lift the screen data cable clip and rotate it toward the MagSafe 2 power supply port. Pull the cable out of its socket on the motherboard. When removing, make sure that the cable is parallel to the device, otherwise its integrity may be broken.


Also be careful when handling the connector. It is dangerous to touch its contacts with a tool or fingers, so as not to damage or leave trace particles of sebum.
In the fan area (to the right and to the left of it), remove the rubber covers from the hinges. Using a T5 screwdriver, remove the two screws that secure the aluminum hinge covers to the top of the MacBook Pro case. Use tweezers to remove hinge covers.


Under the rubber covers are three screws on each side. Use a T8 precision screwdriver to remove the four screws, leaving two screws which are closest to the inside.
Open your MacBook Pro approximately 110 degrees and place it on the table on the display edges and bottom case. Hold both parts of the device with your free hand and remove the remaining screw on each side with a T8 screwdriver to release the display bracket.


In this case, it is important to do this as carefully and precisely as possible, as well as securely hold both parts of the MacBook Pro so that they do not fall. If one of the parts falls down, other components of the device may be seriously damaged.

Take each part with your hands and gently push the bottom (right) side of the MacBook Pro forward to detach the display from the main body. Put both parts aside with the bottom half keyboard down, otherwise you can damage the internal components.

When replacing the display MacBook Pro A1398 Retina, proceed in the reverse order, following the same rules and recommendations. The hinges on the new display aren't always adjusted to the needed angle, so you'll need to use needle-nose pliers to adjust them to fit exactly the hinges at the bottom part of the device. When reassembling, you need to pay attention to several nuances:
Apart from following the instructions, it is important to purchase the original display. You can order the necessary parts for Apple branded equipment from TechToro.io, which has proven to be a reliable supplier with competitive prices and a high level of service. Parts are tested before going on sale, so all components are guaranteed to be original and workable.

|
ABOUT THE AUTHOR
Volodymyr Chubei Volodymyr was born in Ukraine and has found his passion for electronics from his childhood. At the age of 13, he was capable of soldering some basic elements of a logic board and today he is one of the co-founders of TechToro.io |

Problems with the MacBook Pro screen often happen due to human error. There...
Read More

With a critical decrease in a MacBook battery capacity, it is really possib...
Read More

Among all the components of the MacBook Pro, the logic board is one of the ...
Read More

Use this guide to replace the display assembly of your MacBook Pro 13" A170...
Read More